SQL Server Datenbank Design -> Kroki ER Diagramm
https://kroki.io/examples.html#erd
[crayon-662112d1d42bc402268303/]
https://kroki.io/examples.html#erd
[crayon-662112d1d4948943954765/]
[crayon-662112d1d4b01557912127/]
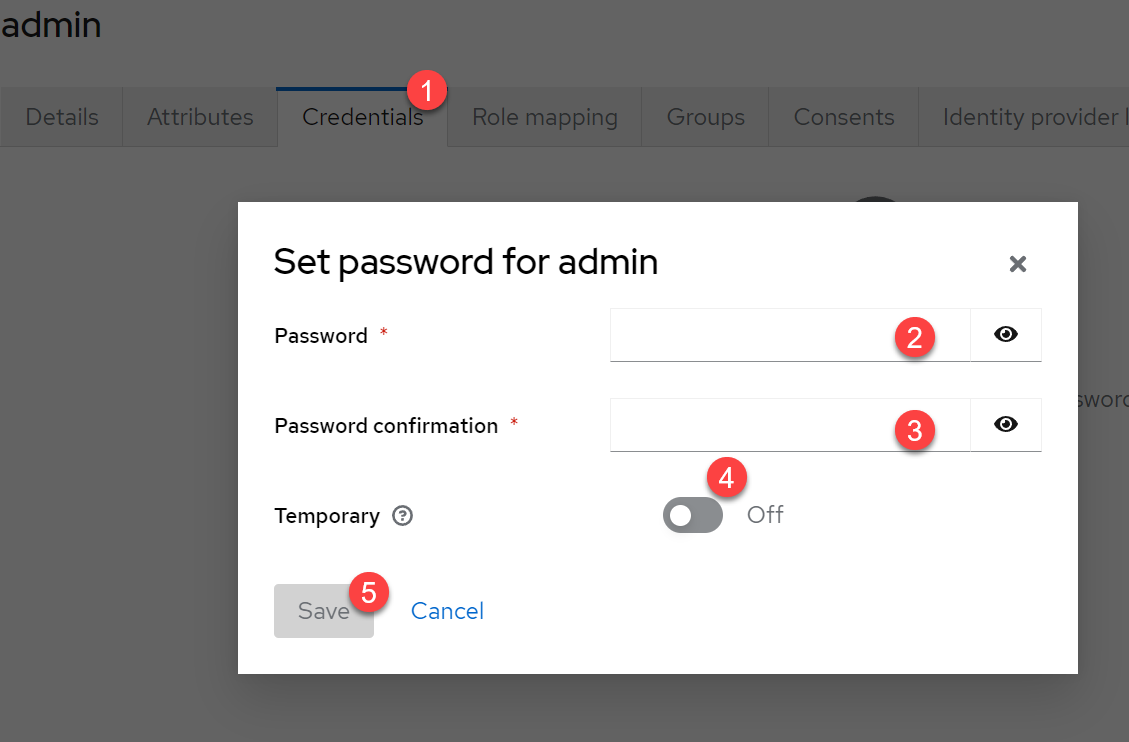
Alt + T -> “NU” eingeben
[crayon-662112d1d4cc3993402883/]
[crayon-662112d1d4e1e893336259/]
[crayon-662112d1d4f66917788774/]
In diesem Beitrag will ich eine Schritt für Schritt Anleitung geben, wie man Nuxt 3 mit Keycloak autorisiert.
Die Thematik um Autorisierung und Authentifizierung bedarf einer soliden Kenntnis in der Thematik. Ich empfehle daher unbedingt sich die Zeit zu nehmen und das folgende Video anzuschauen und sicher zu gehen, dass alles verstanden wurde:
Zum Ende füge ich weitere Lohnenswerte Links hinzu.

Installiertes nodeJs und pnpm sind Voraussetzung
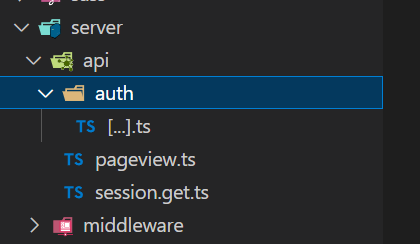 1. server\auth\[…].ts
Wichtig ist, dass die lokale Adresse mit 127.0.0.1 angegeben wird. localhost oder 0.0.0.0 kann nicht aufgelöst werden. In den Url ist der real name enthalten.
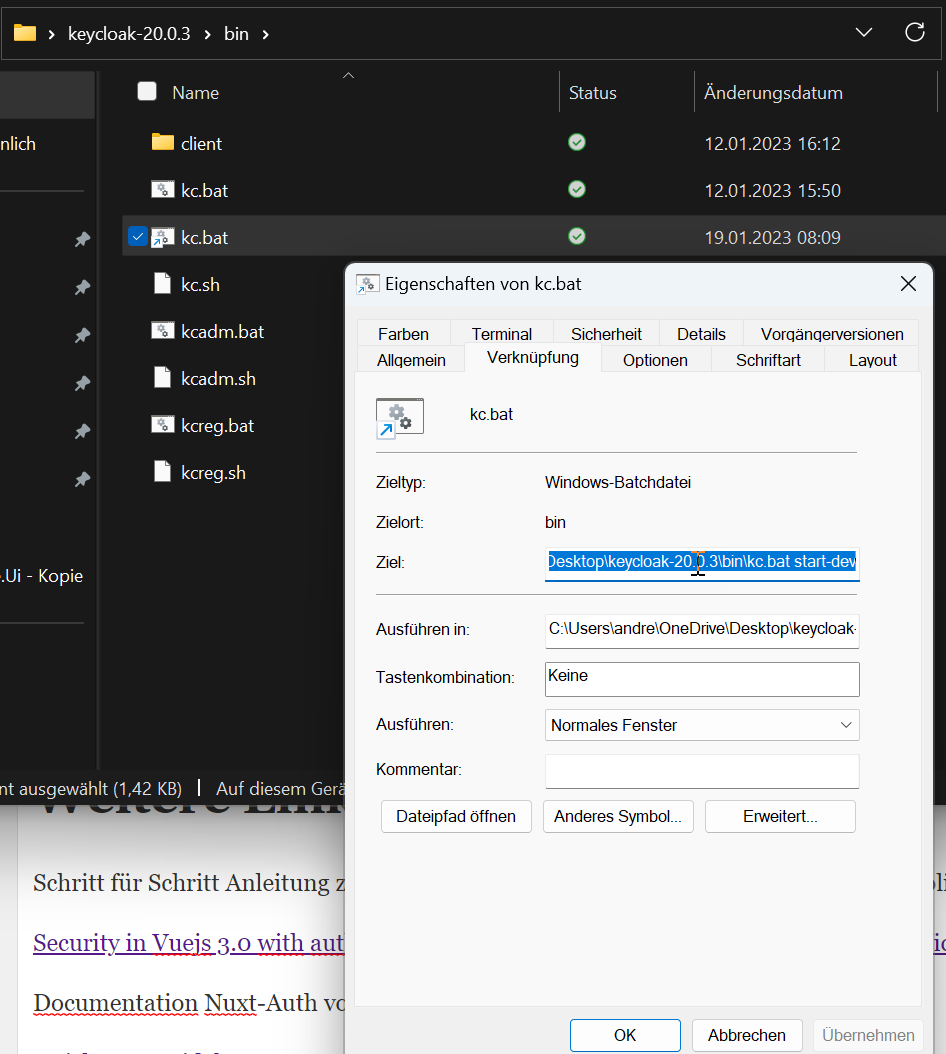
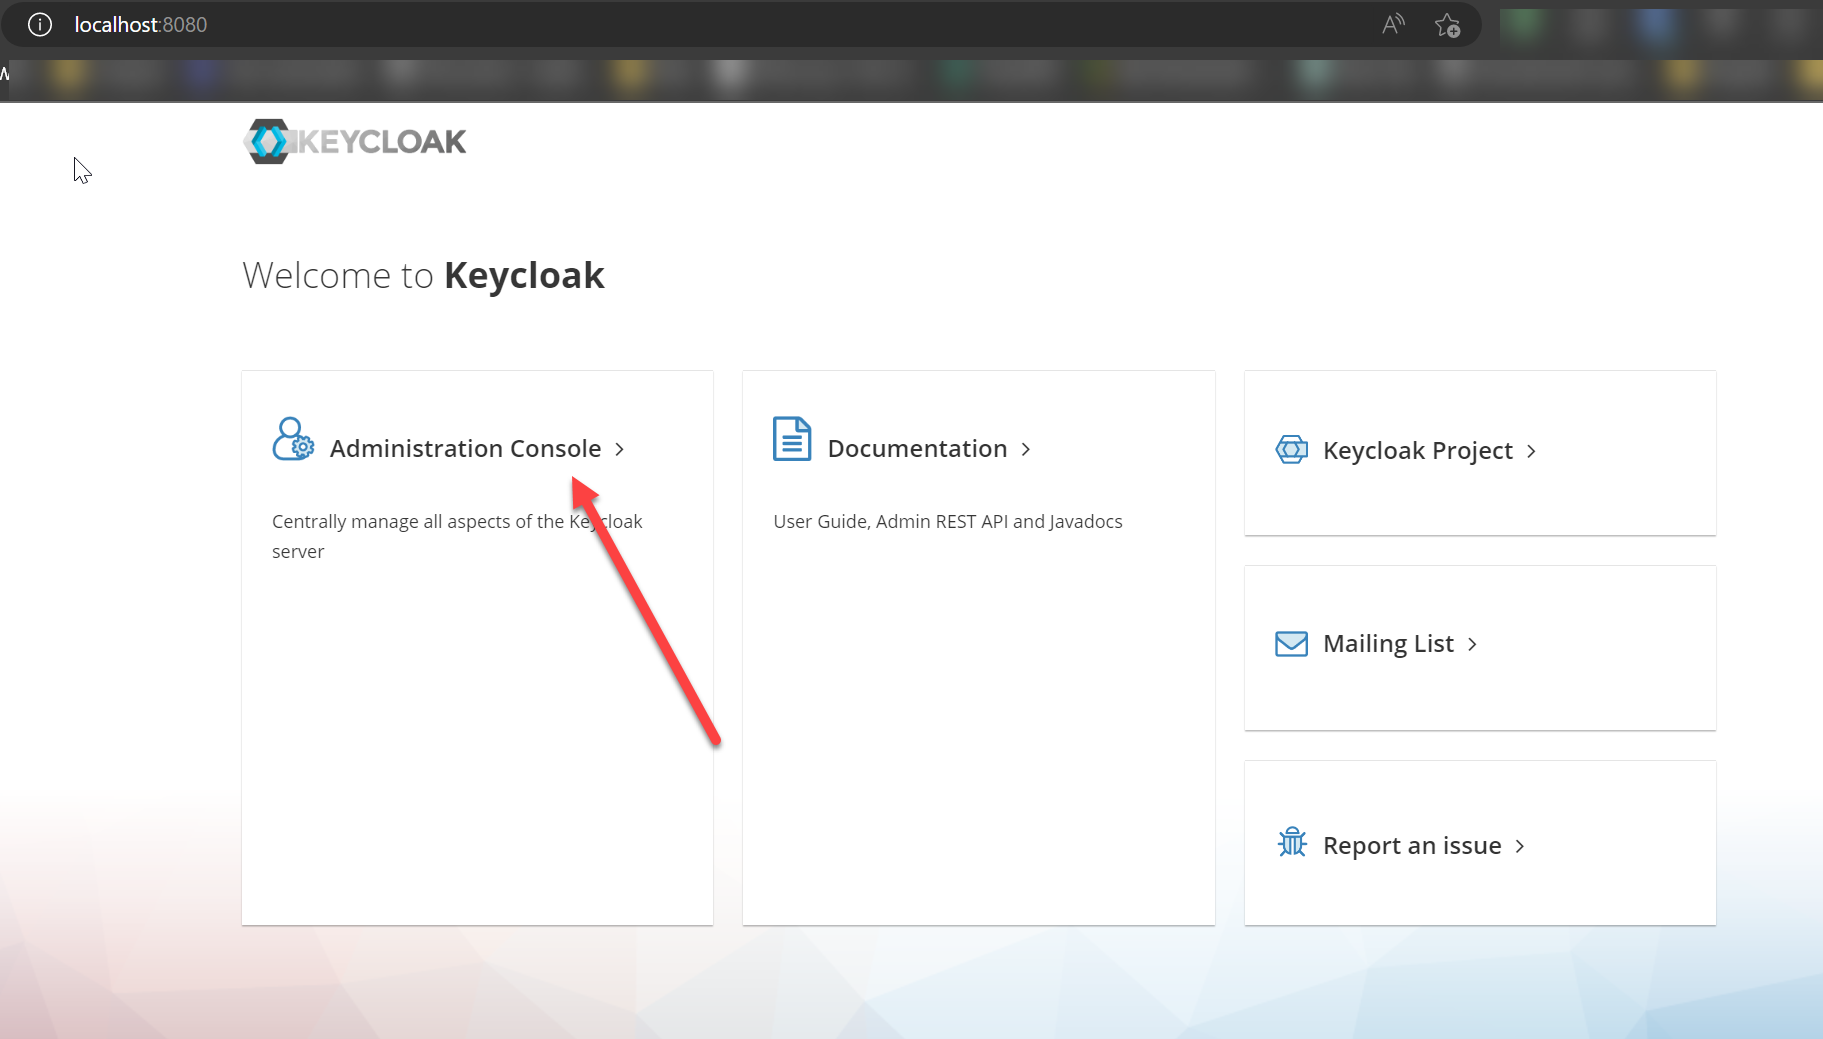
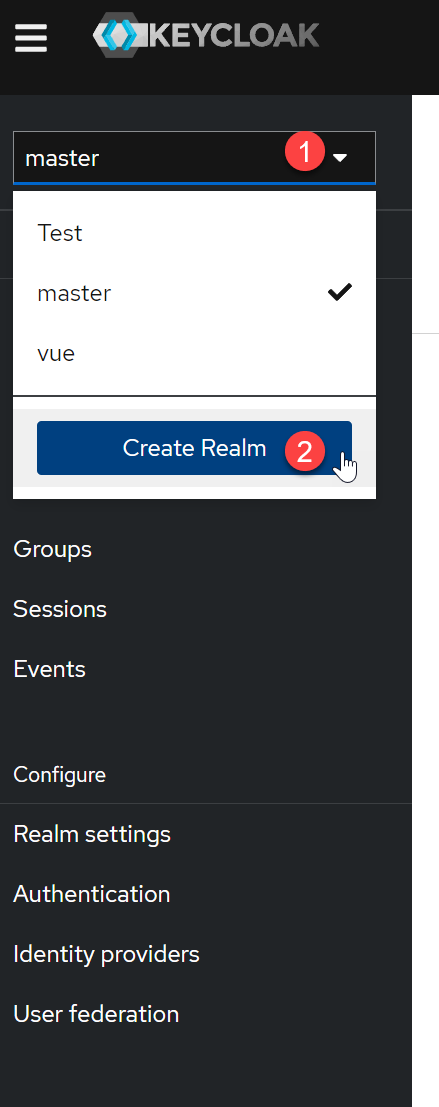
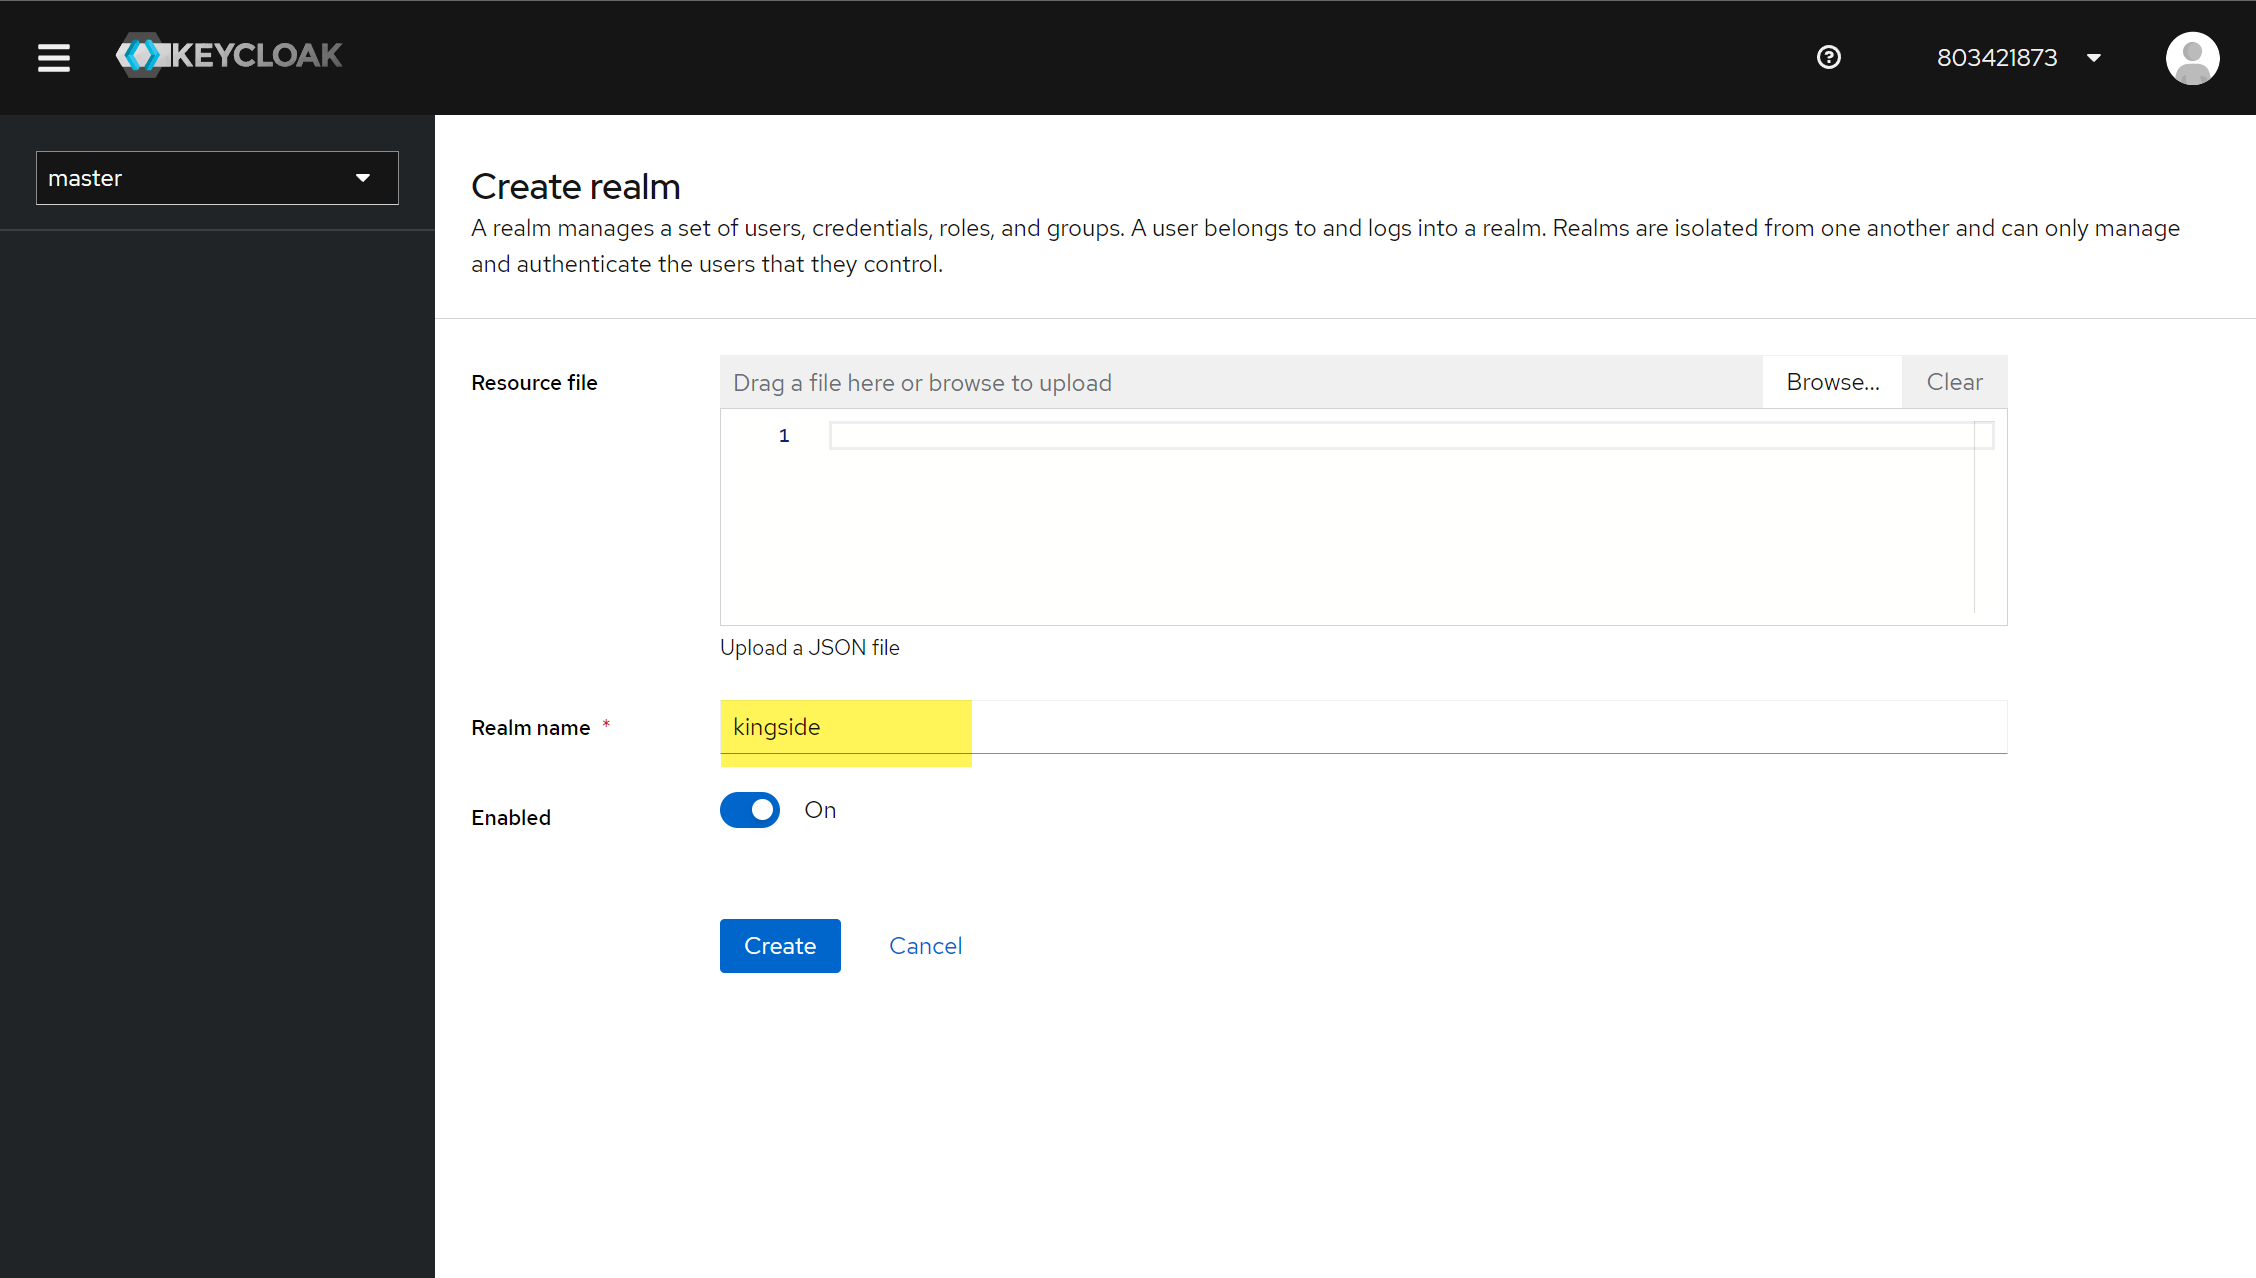
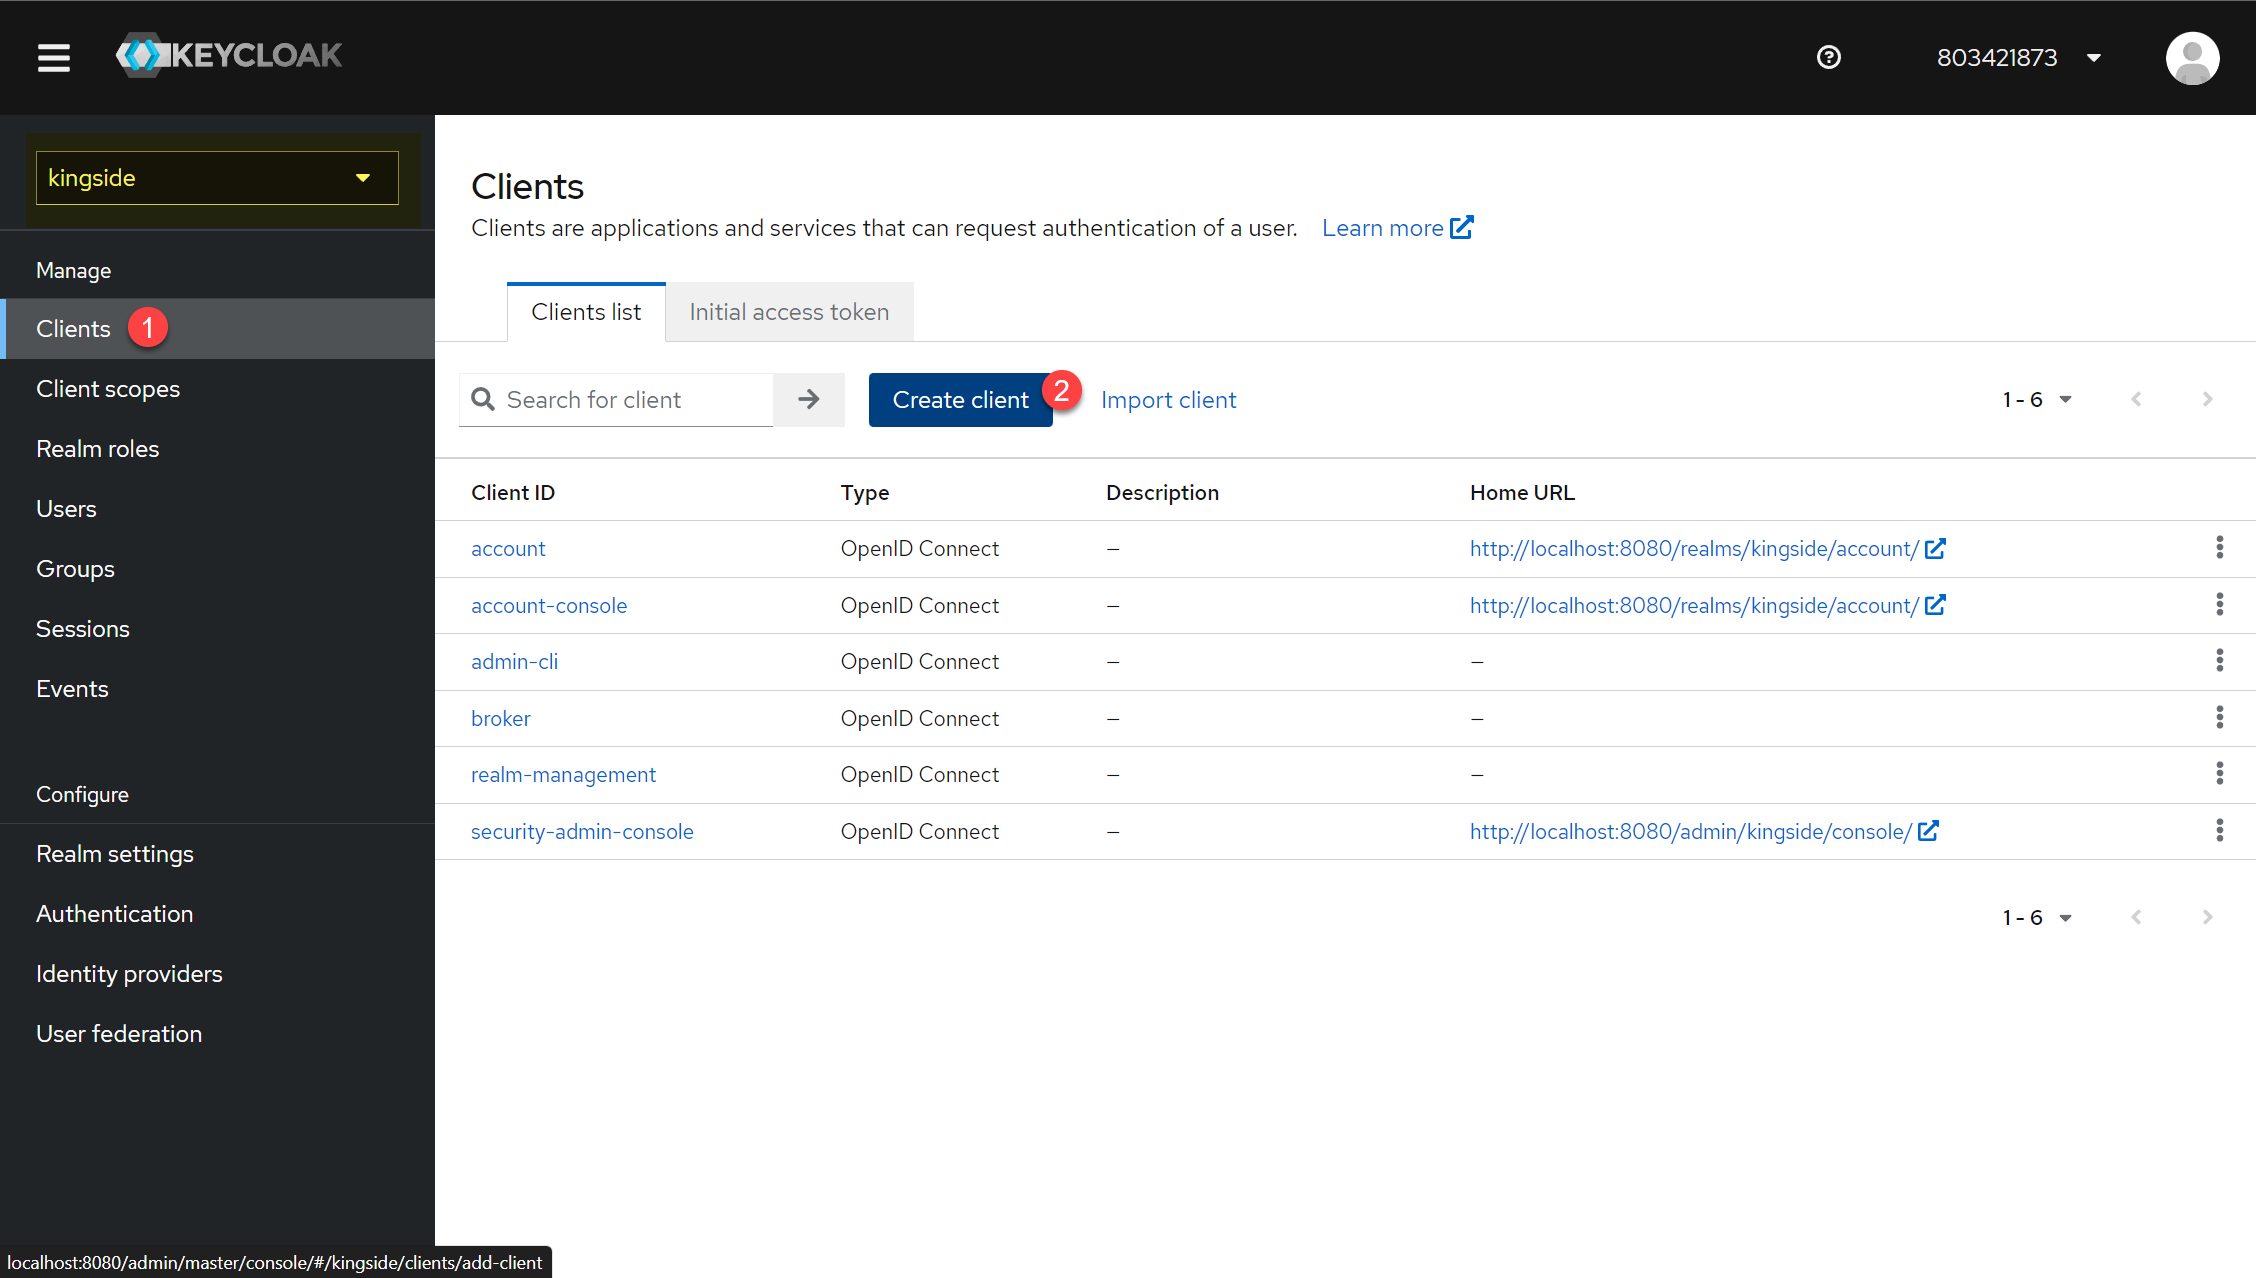
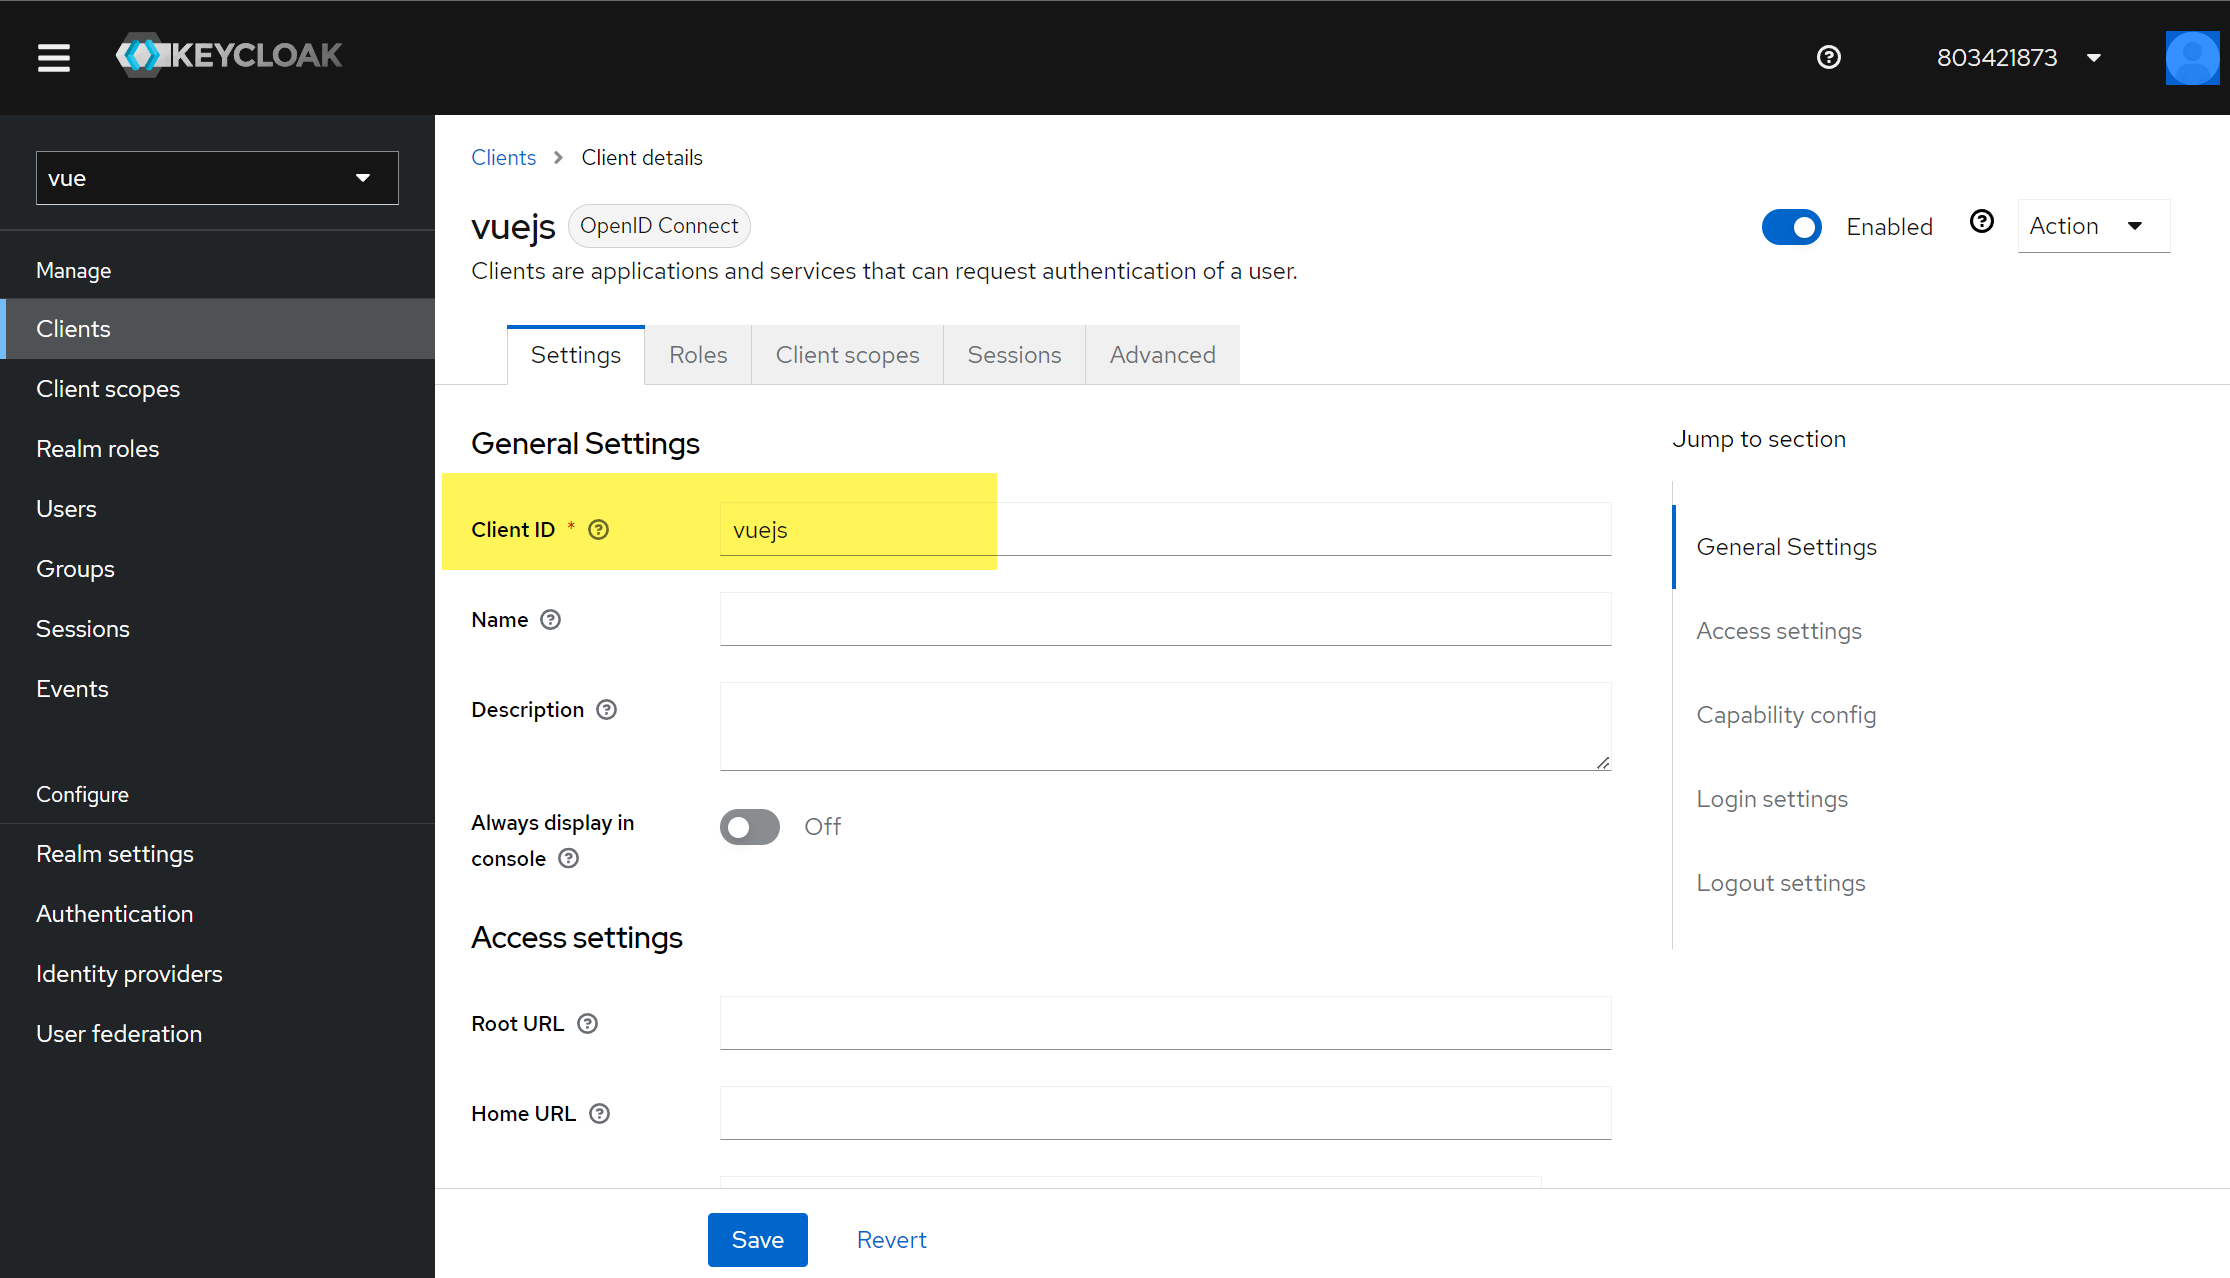
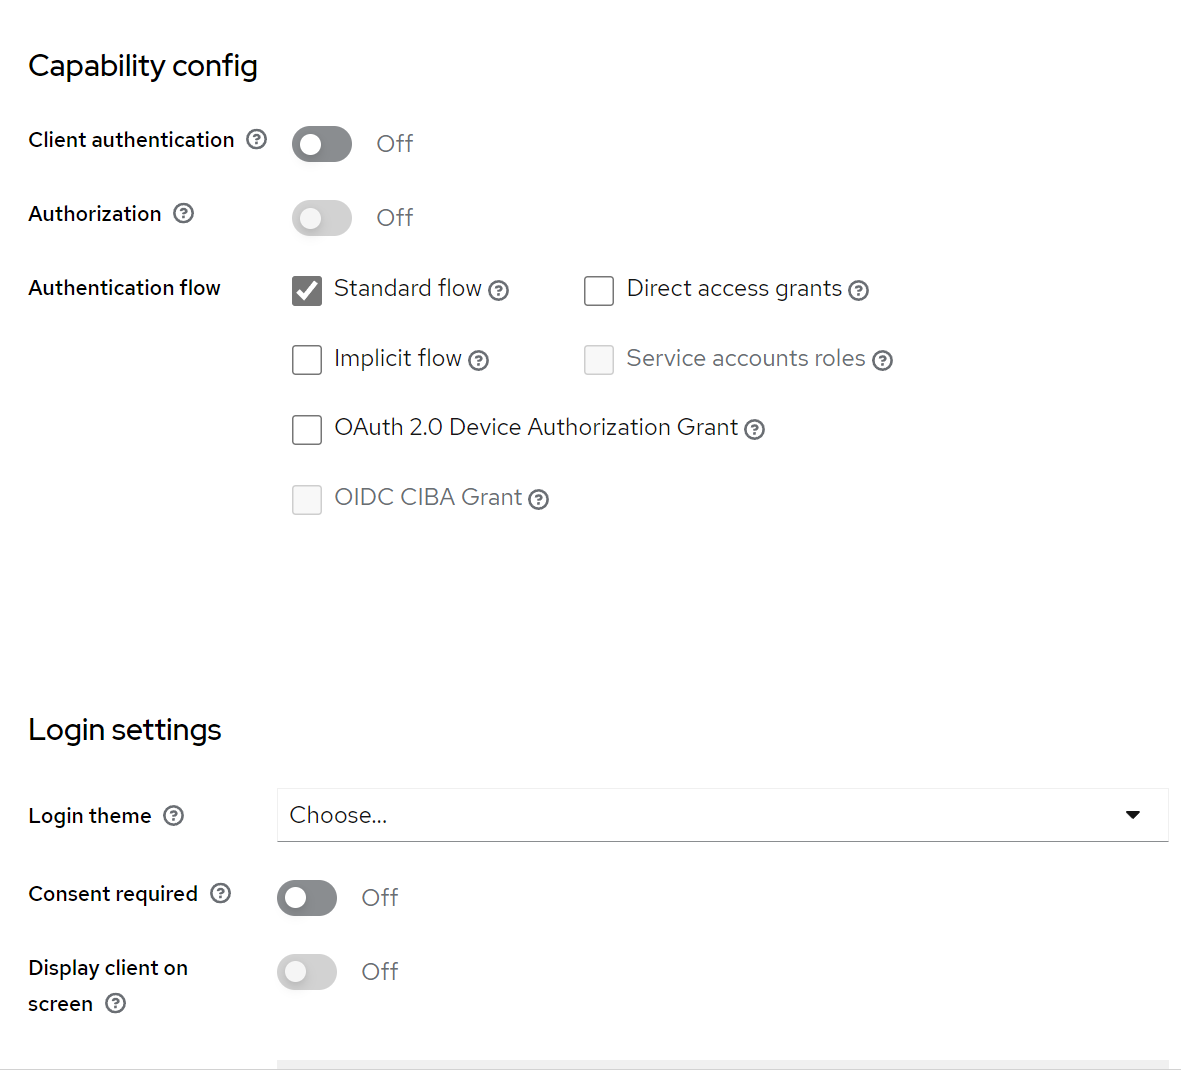
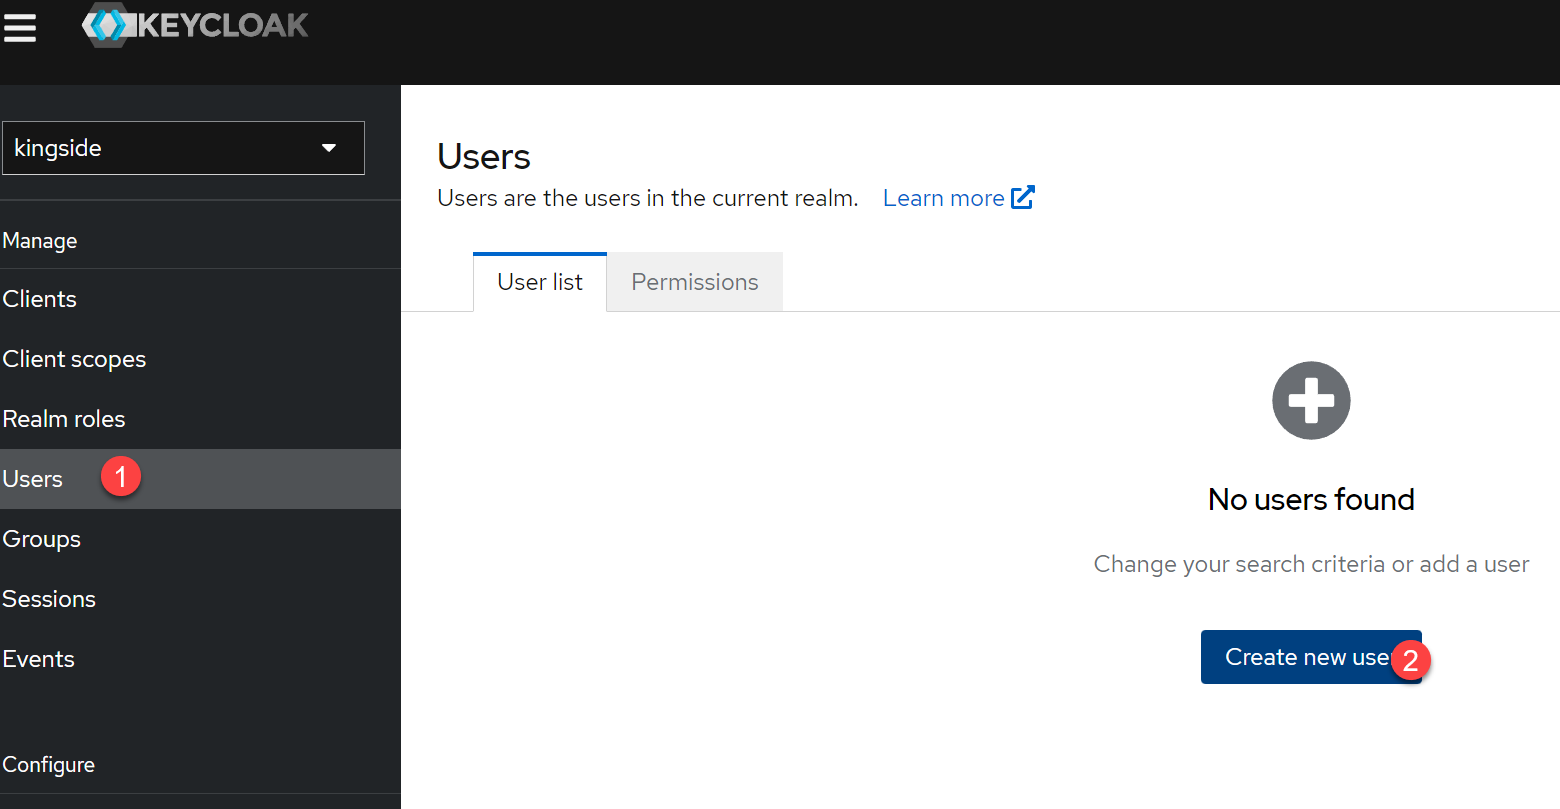
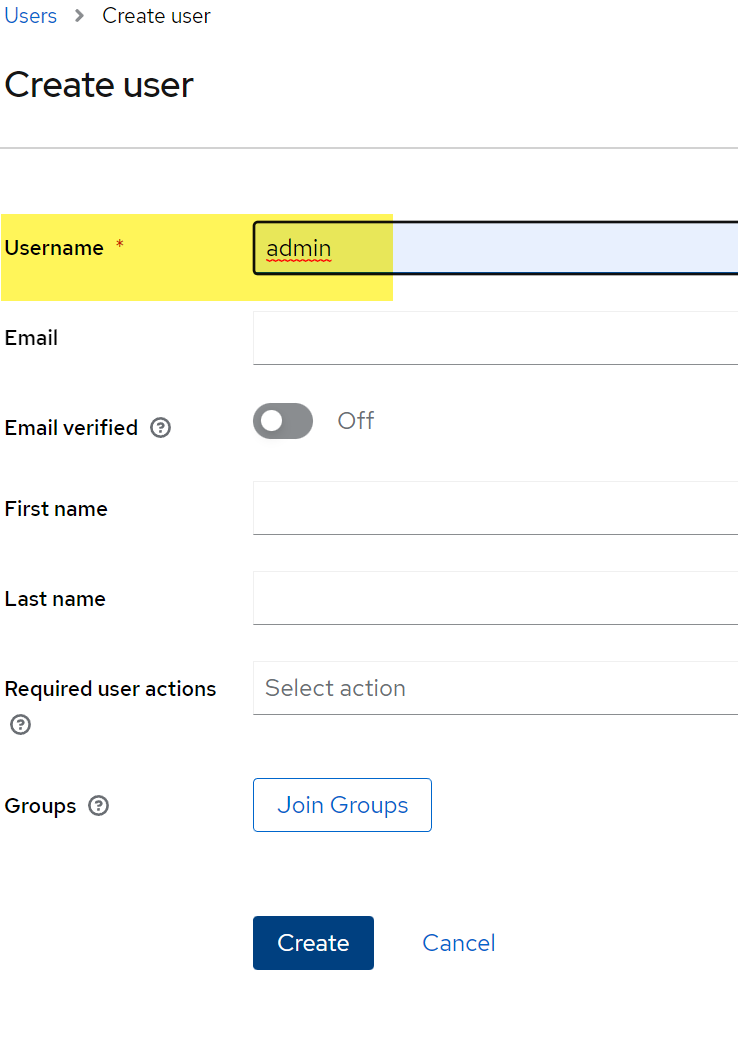
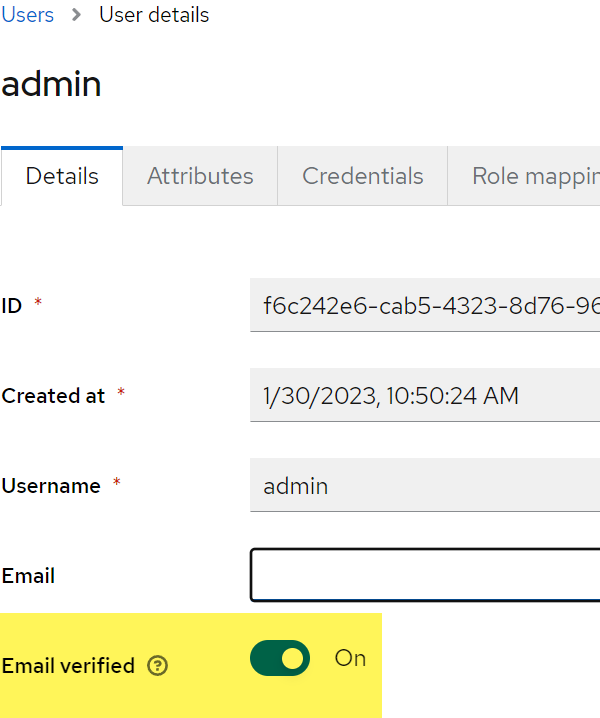
Schritt für Schritt Anleitung zur lokalen Einrichtung von Keycloak und einer Vue Applikation:
Documentation Nuxt-Auth von Sidebase:
Nuxt-Auth wurde von Next-Auth portiert. Fehlende Dokumentation kann hier nachgelesen werden:
Introduction | NextAuth.js (next-auth.js.org)
Ich nutze das prime-vue starter Paket, welches nuxt 3 inkludiert hat. Ich kann das Paket jeden nur empfehlen!
Für OAuth und OpenId Connectt gibt es Debugger. Der Author ist Nathon aus dem YouTube Video weiter oben.
OAuth 2.0 debugger (oauthdebugger.com)
OpenID Connect debugger (oidcdebugger.com)
Keycloak Dokumentation:
Typescript muss in VS Code installiert werden. -g steht für globally (Alle Projekte)
[crayon-662112d1d5333683255021/]
Typescript Version prüfen
[crayon-662112d1d5336432421557/]
Enums
[crayon-662112d1d5337648697378/]
Objekte werden mit reactive<type>({…}) reactiviert und primitive Datentypen mit ref<string>(…)
[crayon-662112d1d5338090837688/]
Mixins werden in eine Vue Instanz hinzugefügt. So als würde man 2 Vue Instanzen verschmelzen. Composables sind dem ähnlich. In Mixins wird alles importiert, bei Composables muss jede Variable, Methode, etc. einzeln importiert werden.
Guter Artikel dazu:
What is a Vue.js Composable? – Vue.js Tutorials (vueschool.io)
Wenn man durch eine App navigiert, dann ist der Seitenaufbau überall identisch. Das Menü, die Kopfzeile und Fusszeile sind auf jeder Seite identisch. Lediglich der Inhalt ändert sich.
In Nuxt 3 werden Layouts im “layouts”-Ordner erstellt und anschließend in die app.vue hinzugefügt. Einzelne Seiten werden im “pages”-Ordner erstellt.
Nuxt 3 routet die pages anhand des Namens. Nur die page “index.vue” wird zum root Knoten geroutet.
Also erstellen wir ein Verzeichnis “layouts” und ein Verzeichnis “pages”.
In das “layouts” Verzeichnis, eine Datei erstellen “default.vue”.
und folgenden Inhalt kopieren:
[crayon-662112d1d54de948484977/]
Dort, wo <slot /> steht, kommt der Inhalt der einzelnen Pages hinein.
Jetzt in das Verzeichnis “pages”
die Datei index.vue mit folgenden Inhalt
[crayon-662112d1d54e2382065455/]
und die Datei “pageOne.vue” mit folgenden Inhalt erstellen
[crayon-662112d1d54e3440433269/]
In der app.vue müssen wir nun sagen, dass wir nicht mehr die Nuxt Welcome page sehen wollen, sondern unser Layout:
[crayon-662112d1d54e4501612811/]
Wenn man aus der Microsoft Welt kommt und Webseiten mit JQuery bearbeitet hat, dann sind UI Framworks wie Vue eine wahre Veränderung. In meiner ASP WebApp habe ich Vue2 über CDN eingebunden und Vue anstatt JQuery genutzt. Vue funktioniert aber am besten mit NodeJs. Der Versuch NodeJs zu erlernen verlief aber immer in Frust. Weil es keinen roten Faden gibt, wie etwas umgesetzt werden kann. Es gibt keinen besten Weg. Es gibt sehr viele neue Begriffe und Definitionen, die Stück um Stück erlernt werden müssen. Es ist definitiv ein anderes lernen wie eine erprobte Sprache wie C# oder Java.
Deshalb ist hier mein roter Faden. Ziel soll am eine App sein, die folgende Punkte mit sich bringt:
NodeJS, Visual Studio Code, Volar Extension. Aktuelle Links sind hier zu finden:
Nuxt 3 – Quick Start (nuxtjs.org)
In Visual Studio über “Strg + Shift + ö” das Terminal öffnen
Neue App erstellen:
[crayon-662112d1d5859180984781/]
Die App wird nun im Unterverzeichnis “nuxt-app” erstellt. Daher müssen wir in das neue Verzeichnis navigieren
[crayon-662112d1d585d157152589/]
packages nachinstallieren:
[crayon-662112d1d585f523920750/]
Referenzen:
[Solved] vuetify icon not showing – Local Coder (Solution 5)
Unter “Version” die neuste Version raussuchen
[crayon-662112d1d5860416511909/]
Sass muss ebenfalls für Vuetify installiert werden
[crayon-662112d1d5861690248703/]
Pinia als StateManager
[crayon-662112d1d5862541362495/]
[crayon-662112d1d5863371736447/]
und die mdi Icons für Vuetify
[crayon-662112d1d5864535559007/]
Plugins werden in Nuxt im plugins Verzeichnis erstellt. Also muss im Root ein neues Verzeichnis “plugins” erstellt
In das plugins Verzeichnis wird eine neue Datei “vuetify.ts” erstellt und folgendes kopiert:
[crayon-662112d1d5865697930949/]
Jetzt muss noch die nuxt.config.ts angepasst werden und das css und der transpiler müssen mit vuetify verheiratet werden. Daher kann der folgende Teil einfach copy/pasted werden. Der Vite Teil wird bei mir als Fehler angezeigt. kompilieren geht trotzdem. Wem das stört, kann den vite Knoten auskommentieren
[crayon-662112d1d5867505730900/]
Jetzt sollte die App starten können:
In der Beta 1 läuft dauert der Start über 1 Minute. Ich hoffe das wird noch gefixt
[crayon-662112d1d586f431957104/]
Weiter geht’s mit Teil 2 Layout: https://devandy.de/?p=890&preview=true